
Your website is finished, and it lives in the worst possible place: a folder on your desktop. Every developer remembers this moment. The pages work, the design looks clean, and yet nobody on Earth can see it except you. The gap between “I built a website” and “my website is live” feels enormous when you’re starting out. In reality, it takes about twenty minutes, costs less than a coffee habit, and requires zero server wizardry.
Let’s close that gap.
This guide shows you exactly how to host html website files step by step: organizing your project, picking a host, connecting a domain, and going live with SSL, all in about twenty minutes.
What You’ll Learn
Why hosting still confuses beginners in 2026
Here’s the irony of modern web development: building a page has never been easier, but the publishing step still trips people up. Tutorials jump straight from “write your HTML” to “deploy with CI/CD pipelines,” skipping the part where a normal human just wants their portfolio online.
The confusion comes from choice overload. Shared hosting, static hosts, VPS, serverless platforms. Reddit threads argue about all of them daily. So let’s simplify with one honest observation: a simple HTML website has the humblest requirements on the internet. No database. No PHP. No build step. Almost any option will technically work, which means your real decision comes down to price, ease, and whether you want your own domain.
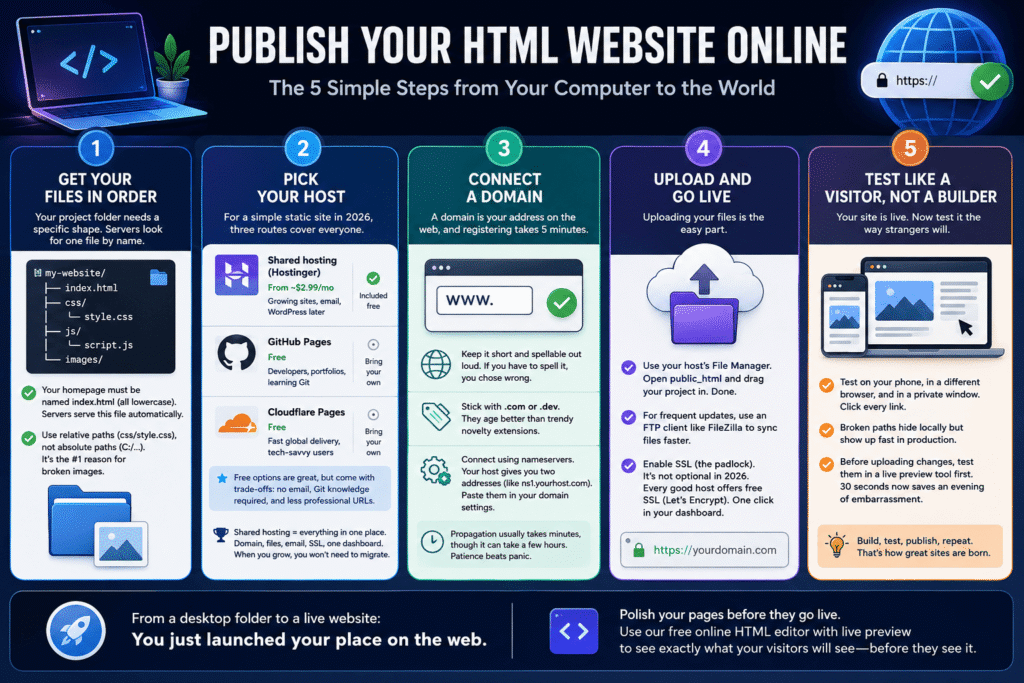
Step 1: How to Host HTML Website Files – Get Organized First
Before touching any hosting dashboard, your project folder needs a specific shape. Web servers look for one file by name, and they are stubborn about it.
Your structure should look like this:
my-website/
├── index.html
├── css/style.css
├── js/script.js
└── images/
The non-negotiable detail: your homepage must be named index.html, all lowercase. Servers serve this file automatically when someone visits your domain. Name it home.html or Index.HTML and visitors will greet a directory listing or a 404 instead of your site.
Also check that every link and image path inside your code is relative (css/style.css) rather than absolute (C:/Users/you/Desktop/…). Absolute paths work on your machine and nowhere else. It’s the single most common reason a freshly uploaded site shows broken images.
Step 2: pick your host
For a simple static site in 2026, three routes cover almost everyone:
| Option | Cost | Best for | Custom domain |
|---|---|---|---|
| Shared hosting (Hostinger) | From ~$2.99/mo | Growing sites, email, WordPress later | Included free |
| GitHub Pages | Free | Developers, portfolios, learning Git | Bring your own |
| Cloudflare Pages | Free | Fast global delivery, tech-savvy users | Bring your own |
The free options are excellent, and I’d be lying if I said otherwise. But they come with trade-offs people discover later: no email at your domain, Git knowledge required, and project URLs like username.github.io/repo that look less than professional on a resume.
Shared hosting remains the beginner’s sweet spot for one reason: everything lives in one place. Domain, files, email, SSL certificate, one dashboard, one bill. When your simple HTML site eventually grows into something bigger (they always do), you won’t need to migrate anything.
Step 3: connect a domain
A domain is your address on the web, and registering one takes five minutes. Most hosting plans include a free domain for the first year; otherwise, expect around $10 to $15 annually for a .com.
Two pieces of practical advice earned the hard way. First, keep it short and spellable out loud. If you have to say “no, with a z, and there’s a hyphen,” you chose wrong. Second, resist exotic extensions for anything serious. A .com or .dev ages better than whatever novelty TLD is trending this year.
Once registered, the domain connects to your hosting through nameservers. Your host displays two addresses that look like ns1.yourhost.com, and you paste them into your domain settings. Propagation usually takes minutes now, though it can stretch to a few hours. This is the step where patience beats panic.
Step 4: upload and go live
With hosting active and your domain connected, uploading is genuinely the easy part. Every host offers a file manager in the browser: open it, navigate to the public_html folder, and drag your entire project in. That’s it.
For frequent updates, an FTP client like FileZilla saves time, letting you sync files like a local folder. But for a first launch, the browser file manager does the job fine.
One final switch matters before you celebrate: SSL. That’s the padlock in the address bar, and in 2026 it is not optional. Browsers actively shame sites without it, and Google quietly ranks them lower. Every reputable host now includes free SSL certificates (thanks to the Let’s Encrypt revolution that started back in 2016), so activation is usually one click in your dashboard.
Step 5: test like a visitor, not a builder
Your site is live. Now open it the way strangers will: on your phone, in a different browser, in a private window. Click every link. Broken paths that hid on your local machine reveal themselves quickly in production.
A smart habit for future updates: test your changes before uploading them. Editing code and re-uploading blindly is how live sites break in public. Paste your updated HTML into a live preview tool first, confirm everything renders, then push it to the server. Thirty seconds of checking saves an evening of embarrassment.
The distance from desktop folder to published website was never really technical. It was just unfamiliar, a sequence nobody walked you through until now. And once you’ve deployed your first site, something shifts: the web stops being a thing you only consume and becomes a place where you build. If you’re polishing your pages before they go live, our free online HTML editor with live preview is the fastest way to see exactly what your visitors will see, before they see it.
So now that you know how to host html website content in under twenty minutes, what’s the project you’ve been putting off?